latest News

COVID-19 Shipping
Due to COVID-19, many countries have suspended postal deliveries, and many others are experiencing extremely long delivery times, something we, unfortunately, learned AFTER shipping many parcels during our recent sale.The below list includes countries we are currently unable to ship to due to COVID-19.Please note this list includes Israel. In addition, there may be significant delays with shipments to any international location, including Japan and Europe.If you're in one of these countries please check thexeroshoessale.com/stores to see if there's a retailer or distributor nearer to you that's open and/or able to ship to you. New Restricted Countries Bermuda Brunei Cape Verde French Guiana Israel Italy Saudi Arabia St. Martin UAE Western Sahara Updated March 27th, 2024

Do Running Shoes CAUSE Injuries?
When I talk to many runners who still use "traditional" running shoes,and then tell them about Xero Shoes, they often say "Well, there's a debate about barefoot/minimalist shoes."First, the quotes are because what we call "traditional" running shoes have only been around for less than 0.05% of the time humans have been wearing protective footwear.Second, there's really no debate.There are people who have opinions that barefoot/minimal is somehow bad based on limited amounts of research, or anecdotes, or information put out by companies that make traditional shoes, and then there is...THE TRUTHYes, I'm implying that the truth is: Natural Movement -- whether you're barefoot or in a truly minimalist shoe like Xero Shoes -- is demonstrably better than being in a padded, motion-controlled, heel-elevated, toe-squeezing shoe.But rather than hash out all my reasons for saying this (which I've done many times on this site), here's a great article that examines "shoes vs. barefoot":https://theconversation.com/running-shoes-may-cause-injuries-but-is-going-barefoot-the-fix-135264Here's the highlight:...if you want to give barefoot running a try, the best advice is to walk before you run. A minimalist shoe might be a good first step if walking or running in extreme temperatures or where sharp objects may be common. Although minimalist shoes aren’t the same as being barefoot, the mechanics runners and walkers use in them are very similar to when barefoot – and dramatically different to when in shoes.And this is the key point. It's about the MOVEMENT, not about the footwear. It just so happens that natural movement is fundamentally impossible in a shoe that, well, doesn't let your foot move. And a truly minimalist shoe can let your body do what's natural, and let your feet bend, flex, move, and FEEL.BTW, a "truly minimalist" shoe isn't the same as a shoe that's marketed as "minimalist" but that doesn't let your toes splay, your foot fend and flex, and your sole get feedback from the ground (which it sends to your brain to help your movement, balance, and agility).

Spot Xero Shoes During Your Next Safari!
Introducing the Front Runner, the first shoe designed to improve the health and performance of rehabilitating cheetahs.The design idea came from New York City Zoologist, Dr. Lex Rodriguez, after noticing that when cheetahs were released back into the wild, the paws of these magnificent cats were not able to handle sticker burrs, hot gravel, sharp rocks, and even the friction they develop by running at over 60 miles per hour.Says Dr. Rodriguez, "I've worn Xero Shoes for years and it occurred to me that the protection, and ground feel you get from these shoes, could be effective for helping these animals transition back to their natural habitat.When he was approached for this project, Xero Shoes CEO was instantly interested."I've been a competitive sprinter since I was a kid," says Sashen. "So it's not surprising that cheetahs are my favorite animal."The Xero Shoes team took their top-selling running shoe, the HFS, and quickly adapted it for feline feet.Both Xero and Dr. Rodriguez were initially skeptical about how the animals would adapt to wearing footwear."We've all seen how domestic cats behave when they step on tape," Sashen said. "They walk around trying to shake it off. We thought the big cats might react the same way."Dr. Rodriquez was more than pleasantly surprised by the initial results. “It’s amazing. They adapted almost instantly. It’s like they don’t even notice or feel anything different, but their performance tells a different story.”Over the last 7 months, the Front Runner was tested on 3 cheetahs of different ages that were preparing for reintegration back into the wild.Reports Dr. Rodriguez, "Wearing the shoes prevented their pads from becoming raw, so they were able to run longer, but they still have the same excellent balance and agility, and their toes can still flex and bend naturally."Most surprising, the cheetahs increased their top speeds by 6%.The zoological research team is still investigating how the performance improvement happens, but the current theory is that the dual-chevron tread gives great traction, without the energy loss that occurs when claws have to dig into the ground.Xero made one significant change between the running shoes they sell online—the Prio, Speed Force, and HFS—they added "Prey Slots" in the FeelTrue rubber soles to allow the cheetah's claws to work naturally when the animal catches prey."There's no value being faster," says Dr. Rodriguez, "if, once you catch up to your prey, you can't, well, finish the job."With just the right amount of protection, the Front Runner should enhance the cheetah's ability to effectively hunt no matter what the elements, keeping the population of prey animals in check and ultimately—helping plant-life by preventing overgrazing.Based on these results, Xero has been approached to develop performance-enhancing footwear for other animals, speedsters and otherwise, including those raised in the wild.Says Sashen, furtively, "I'm not supposed to talk about our 'skunkworks' projects, but we're working on shoes for ostriches, orangutans, and ferrets." Preliminary results are expected by this same date next year.
How to Perfect Your Balance
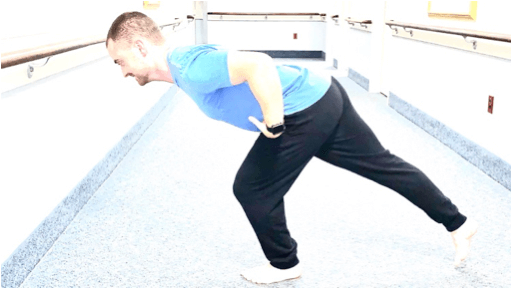
Have you always thought that you just aren't someone with good balance and that's that? Think again. It is totally possible to improve your balance! So how do you do it? Just like a weightlifter needs to lift progressively heavier weights to get stronger, if you want to improve your balance, you need to challenge your balance by placing yourself in unstable positions. In doing so, your body will develop the reflexes needed to maintain balance in that unstable state. This means that you need to be doing exercises that make you wobble...for if you are not wobbling, you are not being challenged. In time, a given activity that once made you wobble, will soon become easy and so you will need to move on to a more difficult activity.Safety first: If you’re concerned that you might fall during a balance exercise, always keep your hand close to some type of support like a sink, counter, or sturdy chair. However, when performing the exercises, you should keep your hands just above your security support and only use them when you feel like you may fall. By having your hands just above the support, you will not rely on your hands to steady yourself and instead will use the balance reflexes found in your feet, legs, and torso. So, let's begin. For an extensive list of balance exercises I regularly use as a physical therapist for patients, head to https://programs.perfectingmovement.net/catalogIf those exercises are either too easy or too difficult for you, all balance exercises can be made more difficult by reducing the amount of visual input you are receiving. This can be done by performing the activity in a darkened room, with eyes squinted, or with eyes closed. In this way, it will limit the amount of visual input your brain receives and so will force you to rely more on your other systems for sensory input.Exercises can also be progressed/modified by standing on an unstable surface such as a foam pad, BOSU ball, wobble board or even a slack line, all of which of course will make you wobble more. As always, anytime you are wobbling, you are challenging yourself and are actively in the process of making your balance better!In this program, I have balance exercises for people of all ages ranging from high-level athletes to geriatrics.So, are balance exercises for athletes too??Absah-freakin-lutely...having good balance as an athlete is crucial toward preventing injuries. This is because good balance is essentially having good neuromuscular control. Without good neuromuscular control, one loses control during movement, and so is at a much higher risk of getting injured. Think about it: Running, cutting, sprinting, braking: all of this happens on one leg at a time. Therefore it is essential to have good neuromuscular control on one leg; ie good balance. Squats and deadlifts are great exercises, but they won’t improve your control/balance on one leg needed for activities like sprinting, cutting, running, and pivoting. Therefore, awesome single balance = not getting hurt = being a real winner.Footwear which can immediately create better balance:When using a thinner, flatter shoe with a wide toe box, one typically has better balance. This type of footwear is called “minimalist”, or “barefoot” footwear. Xero Shoes are definitely my preferred minimalist shoe brand.Here are some of the characteristics and benefits of a minimalist footwear: A wide toe box which allows the toes to splay, creating a wider base of support. A flat sole without support which does not throw off the natural positioning of the foot and ankle. A thin sole which places one’s center of gravity lower to the ground to create improved stability. A thin sole which also allows one to feel the ground more easily. In this way the brain has faster and more descript sensory input needed to create more rapid and effective balance reflexes. In contrast, most traditional shoes have thicker soles, motion limiting “support”, narrow toe boxes, and elevated heels. All of this will disrupt the body’s natural sensory and reactive needed to maintain balance.As a physical therapist, I have had AMAZING success in getting my patients in a minimalist footwear for both reducing pain and improving balance. Once my patients start using minimalist footwear, it is extremely common that they report feeling more balanced and more confident on their feet.Lastly, it is essential that one learns how to walk with proper technique in order to prevent a loss of balance, slip, or a rolling of the ankle. This is because walking with good technique places the foot more beneath the center of mass so that you have better control. Often people take an excessively long stride where the foot is too far forward from the center of mass. The further the foot is away, the less control you have and so are at higher risk of injury. As a guy who used to constantly sprain his ankle, I no longer do so. What changed? I almost exclusively use minimalist shoes and have improved my walking and running techniques. Here is a great video resource to learn how to walk the right way from PerfectingMovement.Net.– James O’Brien MSPT, OCS, CSCS, from PerfectingMovement.netThe content of this post does not constitute and is not intended to be a substitute for professional medical advice, diagnosis or treatment. Always seek the advice of a physician or other qualified health provider with any questions or concerns you may have about your health or a medical condition.
Foot Care for Endurance Athletes
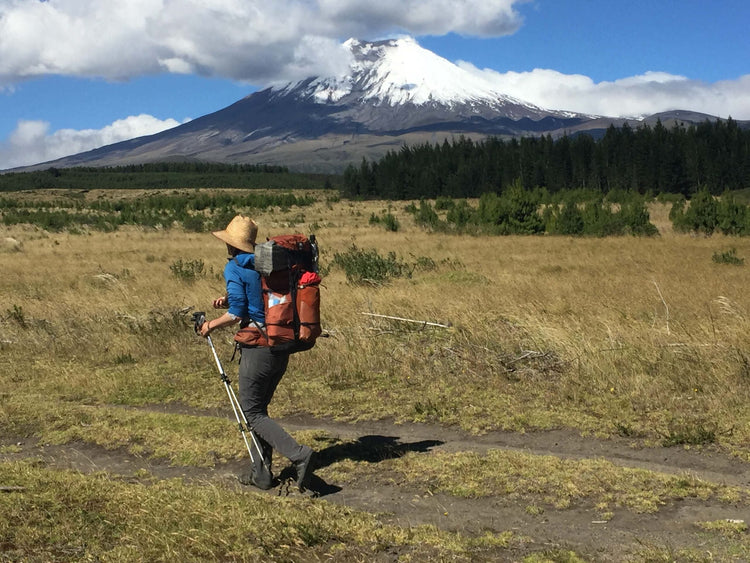
“And forget not that the earth delights to feel your bare feet.” Khalil Gibran Of the 206 bones in your body, 52 are in your feet. Each and every one contributes to getting you to where you are going and is a potential major hindrance if not cared for. As a long distance, long term athlete, I spend a lot of time on my feet. Over the last 7 years I have hiked 12,000 miles, paddled 1,500 miles, and bikepacked 4,000 miles. With 3,500 miles left to complete a non-motorized traverse of the Americas, physical maintenance, and specifically foot care, is crucial. One of the important lessons I’ve learned has been moderation. It sounds silly putting those two thoughts into the same sentence but it is a fundamental truth to how I’ve been able to keep going for so long. Maintaining a pace and stride which works for me, resting when my body needs it, and giving it the resources it needs to stay healthy and moving are all examples of moderation and care which I began learning when I started thru-hiking over a decade ago. And which I continue to learn and relearn when my body makes her demands known or insists in the form of months of illness, repeated bouts of overuse injuries, or other physical break down. Interestingly, these sorts of issues don’t usually spring upon you all at once. There are signs, symptoms. That tweak in your lower back. Is that a one time thing or is that the beginnings of chronic pain? Every endurance athlete knows this fear and the fact is, you never can know which it is going to be. What you can do is incorporate a steady practice of care and strength building to give your body its best chance. Similarly, there are dozens of small things you can do to prevent going down that road, or to aid in recovery as you regain strength and stamina. These are a few of those small practices which can make a big difference Dry Your Feet I spent the first 3 years of my backpacking career battling with trench foot. I came to think it was simply part of the experience. I tried doubling up on socks, traded my way up into Gortex boots and the issue only worsened. When wearing shoes and socks, your feet are experiencing a very different climate than the rest of your body. Usually it is a warm, damp environment, just the sort of place fungus like to grow. I was super glueing deep cracks in my heel shut. Until finally one day I swung in the opposite direction and wore lighter shoes and began airing my feet out more often. I quit sleeping in socks and the issue subsided. If you go barefoot or wear open sandals, your feet will be able to dry naturally. Still, if you are on a multi-day trip, rinse or wipe your feet off at the end of the day, paying special attention to the areas between your toes. Not only will this keep your quilt or sleeping bag cleaner, but it will also keep your foot skin healthier. When you are in a closed shoes sort of environment giving your feet time to air out whenever possible. Whether that is under your desk at work, on a lunch break along the trail, or the drive home from the trailhead, keeping your feet clean and exposed to the open air contributes significantly to your foot health. Mix it Up Cross-training caught on in the endurance sport world over the past 20 years. All our muscle groups were made to work together so having one set particularly overdeveloped while others languish, doesn’t serve the sustained health of our physical systems in the long run. The same goes for our feet. While thru-hiking the CDT this past summer, I was retraining my feet after several months spent exclusively in my Xero sandals on sandy beaches and in a kayak. Due to constant high mile days, the weight on my back, and the terrain, I opted to hike in trail runners with more padding and zero drop and quickly began to have arch pain. Thus I began alternating between my sandals and trail runners throughout the day. Once the frosty mornings were past and when I took a breakfast break and aired out my feet, I would switch into my sandals for a few hours until lunch. At big river crossings, on smooth trail, and around camp, I was in my sandals. On thorny bushwhacks, across lava rock, and other rough environments, or at the end of the day when I was tired and not able to be as careful with my step, I would switch back into my trail runners. This switching back and forth made me very aware of my gait which is helpful because a hyper-extended gait is a leading cause of shin splints. While the cushion of the trail runners invited this sort of step, my Xeros reminded me not to fall into that. Thus, if like me, you aren’t ready to spend 100% of your time barefoot, there are still many ways and a lot of space for barefoot practices to improve your awareness of how you move, and your experience of both your body and the outdoors. Thank Your Feet Now, here I may get a bit hoakey for some folks, and I don’t mind if you skip on to the end, but at the end of a long and challenging day, I like to thank my feet. I leave my shoes at the vestibule, peel off my socks, and either soak my feet in a nearby stream or give them a good wipe down with a baby wipe. Then, sitting in the butterfly position or lying on my back in a modified happy baby pose, I wrap my hands around my feet and begin to stretch. Beginning just above my ankle bone I rub small circles and check in with all those tiny bones. With the texture of my skin. With the cracks in my skin. I thank them for the miles they have put in. Marvel at the ground they have covered and conditions they have weathered. Doing this I work my way all the way down the tops of my feet and then begin again at the ankles and cup my heel. In thru-hiking, that part of the foot takes a lot of heavy strikes and a lot of modern footwear encourages this, so they get an extra thank you for taking that extra whooping. Focusing on the soles of my feet and paying particular attention to both arches, I make my way to the toes. Stretching each toe individually and then tugging outward from the tip, pulling them long and a good final stretch before crawling into my sleeping bag and asking my body to do it all over again tomorrow. Endurance athletes ask a lot of our bodies but every thru-hike, ultra, or even just a junt around the block starts with one small step. The same measured moderation and care applies to foot care. Taking a few minutes out of your day or tacking a few extra on to your training routine may be hard to convince yourself of when you are trying to make miles or balance a busy lifestyle. Whether it is washing and airing out your feet, switching out shoes, or staying awake a few minutes longer in your tent to stretch your soles, small steps can make the biggest difference in the long run. After all, your feet are carrying the most weight on your body, giving them a few minutes of dedicated care is the least you can do. –Adventurer Bethany Hughes The content of this post does not constitute and is not intended to be a substitute for professional medical advice, diagnosis or treatment. Always seek the advice of a physician or other qualified health provider with any questions or concerns you may have about your health or a medical condition.

Can you get Energy Return from your shoe's cushioning?
I wish more people understood physics better.Sure, I say this in part because I got interested in physics at an early age. When I was 14, I was tutoring people 3-5x my age in antenna design, electronics, and other physics-related topics (I was an Extra class ham radio operator).But the other reason is that knowing physics makes you immune to certain types of marketing spin, which can save you countless hours of time (not having to personally test something that's patently false), and money (not buying products marketed with misleading bastardizations of principles of physics).It also makes you an unpopular party guest, since people don't like having their mythology bubbles burst, and when you overhear someone spouting incorrect explanations of reality, it's impossible to walk away without tossing in a corrective comment.At least I can't.What does that mean when it comes to finding comfortable shoes, sneakers, sandals, and any other type of footwear?Two words:ENERGY RETURN FROM RUNNING SHOES? Running shoe companies in particular tout the "energy return" of their foam or other types of cushioning.The more energy return, the better.Makes sense, right?Well, let's just say that if I heard you waxing eloquently about the energy return in your new, super expensive, high-tech, cushioned shoes while you sip a beverage from a Solo cup, I'd force my way into the conversation and say:"There is no such thing as 'energy return.' "Even if I didn't have my own Solo cup's worth of liquid (and it would probably be water; I'm not much of a drinker), I'd then blurt out:"There are only different levels of ENERGY SUCK."It's just physics.No foam or cushioning or springs or shock absorbers or carbon plates or anything else that's ever been added to any part of a shoe has ever RETURNED more energy than you put into it when you land on it.Therefore, all of those components SUCK energy from you.Think about a trampoline. Sure you can bounce really high... but only until your leg muscles get tired. The trampoline bed optimizes the combination of gravity and your musculature (but only to a point, since you don't keep bouncing higher and higher forever).Same thing with foam in your shoes.The foam sucks.And, worse, it sucks more and more with time because it begins to break down the moment you start using it.My friend, Dr. Geoffrey Grey from Heeluxe (a footwear research firm) just wrote a great post about this: Why Energy Return is a MythHe addresses the new Nike Vaporfly 4% and the Nike Next % as well as the VKTRY insoles, but his points apply to all shoes Here are the highlights: Key Point 1: All foams lose energy.We already touched on this. And, again, it's not just foam.All cushioning does the same thing. Key Point 2: Carbon Fiber isn’t typically used as an energy return material.The carbon fiber in the Nike shoes and the VKTRY insoles is held out as part of the energy return equation.Carbon fiber is stiff.If you think about it, having a layer of carbon fiber is just adding a non-compliant surface into the shoe... like a road or a track or a sidewalk.There are some who claim that the carbon fiber plate in the Nike shoes "act as a lever" and that's what creates energy return.Again, sounds good unless you understand physics.For a lever to function, it needs a fulcrum.There's nowhere in the shoe that's a point on which the carbon plate rests or pivots.Even more, check out where the runners in Eliud Kipchoge's sub-2 hour marathon land on their foot (and therefore in the shoe):Notice where they're landing?Midfoot and forefoot.There's no fulcrum under the midfoot. So, no lever. Just something solid, again, like the ground.Next... Key Point 3: Shoes with higher energy return on mechanical “ball drop” tests won’t work for everyone.The "ball drop test" is how most shoe companies demonstrate their "energy return."They literally drop something like a 2 pound metal ball onto the sole of the shoe, or the cushioning material, and see how far it bounces back toward the original height.Physics -- NEVER higher than where it started.Reality -- YOU ARE NOT A SOLID 2 POUND METAL BALL! (I'm assuming)The ball is only accelerating toward the sole based on gravity (accelerating a 9.8 m/s squared). You are not falling from that same height and the force that you hit the ground is not the same as a 2 pound steel ball.If you weigh 150 pounds, you could hit the ground with 500-600 pounds of force, or more! And your muscles, ligaments and tendons allow your joints to BEND, unlike the metal ball which doesn't compress (okay, technically it does by a TINY amount).More Physics -- foam breaks down from the moment you start using it, so the ball test results will change over time.In fact, the reason most shoe companies tell you to replace their shoes every 3-500 miles is that this is when they think the foam has degraded to the point of being useless (and, often, they make sure the rubber outsole wears out at about the same time).SHOE SECRET -- most foam is barely better at 300 miles than 500... and often it's just as bad at 200 miles! Key Point 4: Foams with higher energy return feel good to some people.Feeling good is a wonderful thing.But that doesn't mean it's DOING something good for you.Let me ask you a question:If you were going to do pushups, would you rather do them on the floor or on a memory foam mattress?I'm guessing you said "Floor" and the reason is that you know a foam mattress is squishy and would make you unbalanced, while the floor gives you something solid and stable as a base.This is basic Newtonian Physics (the 3rd law) -- For every action, there is an equal and opposite reaction.If the opposite reaction is squishy, it messes up your initial action.The mattress FEELS good, but isn't good for natural movement.Same thing with foam in a shoe.Wrapping it up...Needless to say, we think of Xero Shoes as "physics friendly."Our barefoot shoes don't use unnecessary amounts of foam. We don't use marketing spin to take something bad (foam sucks energy) and re-label it with something that sounds positive, like "energy return."We believe that you're smarter than that.Even if you don't know a lot about physics ;-) What do you think? Leave a comment, below.
Why it Makes Sense to Switch Your Shoes During Pregnancy
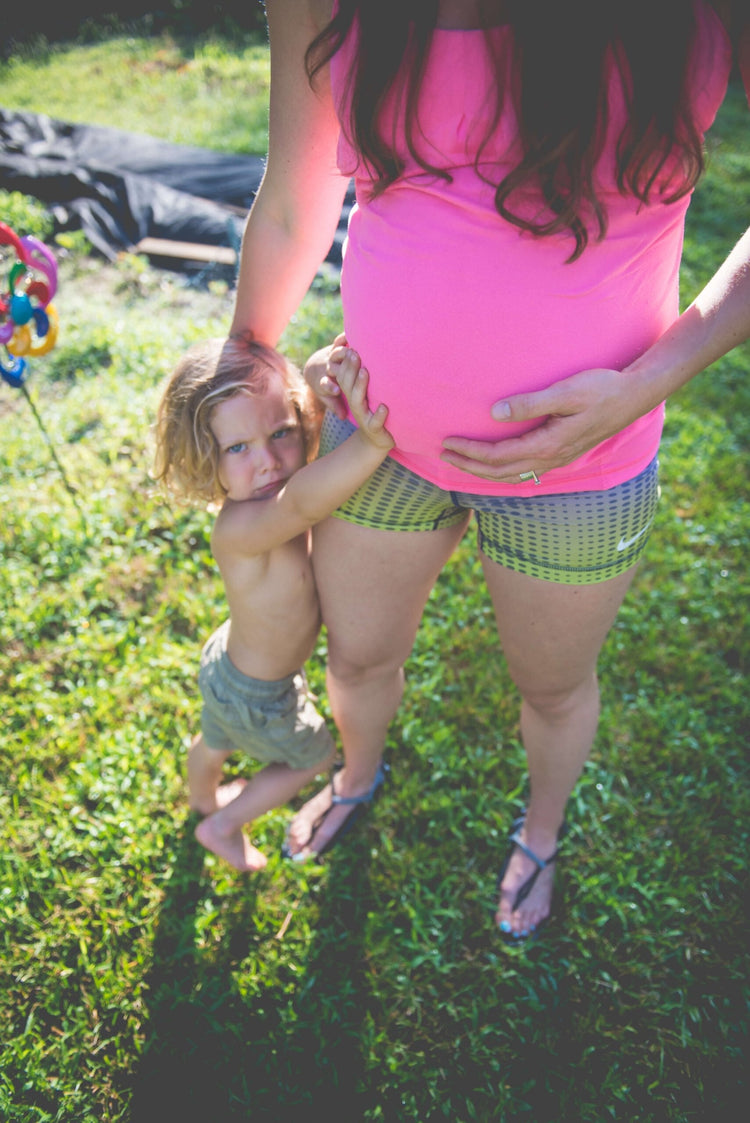
From a big picture standpoint, pregnancy is a time of growth and change. The anatomy of a mother’s body is rapidly adapting to the projected growth of the fetus (things like a widening pelvis and ribcage, changes in spinal curvatures, stretching of abdominal tissues, and shifts in the center of gravity). A lot of the changes happening are credited to relaxin, a hormone that is found in numerous tissues and systems throughout the body, but increases during pregnancy and breastfeeding and acts to relax tissues. One of the changes that many women experience during pregnancy is a change in shoe size. Rather than lamenting this perceived inconvenience, I think it’s a perfect opportunity to take advantage of the body’s changing physiology. Feet that have been convinced to look like shoes rather than feet often have an uphill battle in regaining their natural shape, flexibility, and strength. But when relaxin is present, the body is more amenable to change. We can take advantage of this and invite our feet along for the ride. There are a few reasons why pregnancy is the best time to make the change to more neutral and natural footwear options. Here are three: As I mentioned earlier, there’s relaxin; this hormone is helping the body prepare for the baby to grow as well as exit the body, which means it’s making changes. Adding in some simple foot mobilization can feel great and also may help accelerate these changes. The shift forward in the center of gravity makes being pregnant similar to wearing high heels when non-pregnant. Doubling down on this shift forward causes most women to avoid wearing heels when pregnant. But whether they’re stilettos or traditional running shoes, shifting the center of gravity even further forward than it already is during pregnancy generally feels uncomfortable in the calves, quads, and low back. There’s no better time to be barefoot. Pregnancy calls us to really be IN our ever-changing bodies. Taking some time to pause, connect to the ground, and just BE can be incredibly beneficial. From a literal standpoint: the more comfortable you are with your feet on the ground, the easier it is to stay grounded. A few ideas to get started if you’re making footwear changes while pregnant: Go slow. There are a lot of changes taking place in your body; don’t overwhelm it. Start out just being barefoot in your house; once that’s completely comfortable, add in walking outside barefoot. When you change footwear, don’t wear your new shoes all day. Start with a few hours, and gradually build up the amount of time you spend in your new kicks. Speaking of new shoes: Your foot may continue to change sizes. As pregnancy progresses, your feet may increase in size; this might revert postpartum, but it might not. From an economical standpoint, it probably makes sense to get some multi-purpose shoes (ones you can wear to work, but also workout or go hiking in) rather than swapping out every single pair of shoes you own only to find that the size change was temporary! Wiggling your toes is a simple way to bring awareness to your feet and get them moving in a way that doesn’t typically happen while shod. Barefoot shoes allow for ample space for your toes. Try to move the toes individually and slowly for more of a challenge. Relaxin stays present in the body postpartum, so in the first few weeks postpartum while you are allowing your body to regulate to its new normal, you can gently work on foot and ankle mobilizations. A time of growth and change can be scary and overwhelming. But if we take small steps (literally), this amazing time can actually give us a much-needed boost in helping our body function at its best! Looking for shoes that will provide comfort during your pregnancy? The Prio Coast step-in hands-free sneaker is a great option. Lindsay Mumma, DC @lindsaymumma Photos by Amanda Ditzel, Raleigh Birth Photography The content of this post does not constitute and is not intended to be a substitute for professional medical advice, diagnosis or treatment. Always seek the advice of a physician or other qualified health provider with any questions or concerns you may have about your health or a medical condition.

Are you running WRONG?
What's the difference between "good running" and "bad running"?Those of us who promote natural movement and barefoot running have some thoughts about that.Typically, we talk about: Landing with your foot "under your body" (don't reach out in front of your body with your foot -- "overstriding") Increase your cadence a bit (there's no magic number, like 180 steps per minute, but increasing your foot speed without increasing your running speed makes overstriding more difficult) Land on your forefoot or midfoot (it's hard NOT to land that way if you don't overstride, and don't point your toes to make this happen. BTW, some research suggests forefoot is better because it lets you use the "spring" in your foot's arch) Keep your core engaged (you want to be a "tight spring") But what does SCIENCE say?Well, take a look at this super-cool presentation by David Mark, showing some running analysis by biomechanist Dr. Aaron Beachhttps://www.abc.net.au/news/2019-12-11/why-everything-you-thought-about-running-is-wrong/11775598They use some great visualizations to compare Olympian Jenny Blundell to recreational runner, Ruby Cornish.The only thing different in Beach's analysis and recommendations from what I show above, is that he doesn't suggest trying forefoot landings. But my bet is that if Jenny was a forefoot landing runner he'd comment on the value of doing so.One other subtle thing is that he recommends that Ruby have more hip extension (or what some would call "backside mechanics"). This isn't something to work on, but simply the effect of having a stride where your foot lands under -- or close to -- your center of mass, with the correct cadence.It why we say that good runners "run out of the back."I think you'll love the visualizations. Let me know what you think.

Happy Xero-ween!
Halloween is a favorite day here at the Xero Shoes office. Lena Phoenix -- Xero Shoes co-founder, CFO, and G.L.O.W. (Gorgeous Lady of Wrestling!) Halloween? Or just another typical Thursday at the Xero Shoes office? But, then again, we also dress up for "Onesie Wednesday" and "Non-casual Friday" (which is more open-ended than Formal Friday). Of course, some people go above and beyond and dress AS XERO SHOES! Whether you trick-or-treated or just gave out candy, if you did it Xero Shoes, we want to see your pics and how you Live Life Feet First!

A Rubber Band is the Secret to Better Running?
Could a new form of foot binding be the secret to better running?I don't mean wrapping up your feet in the infamous style of ancient China, but something developed by some mechanical engineers at the University of California, Santa Barbara.In short, they attached some rubber tubing between runners shoes and found that they ran more efficiently.Every stride, you slow your body down and speed it back up again," losing energy that could otherwise be conserved or put into running faster, said Elliot Hawkes, who was a postdoctoral fellow at Stanford when the research was conducted. "90 percent of the energy you put into running is wasted, in a sense.The solution to this, according to the researchers?Tie the legs together with a rubber band. Adding that band between a runner's legs could help slow both legs when they are far apart, then give them a little kick as they came back together--saving energy at both ends.While they didn't publish images of runners who weren't using the rubber tubing, here's what they showed for runners who used what they call an "exotendon":What was the effect?An improvement in VO2 Max (what many people think of as running efficiency) by an average of 6.4%Sounds amazing right?But before you go out and buy an exotendon, let's take a look at what's REALLY going on here.Can you see what the rubber band does?Start by looking at the middle image in the top row, above.You can see that the runner is about to land on their heel, with the foot relatively far in front of their body. This is a typical "overstriding and heel strike" pattern.When you run like this, every time your foot hits the ground that far in front of you, you're basically putting on the brakes. And when you land on your heel like that, research shows that you're sending force into your joints rather than using your muscles, ligaments and tendons naturally -- as built-in springs and shock absorbers.Now look at the far right image in the top row.The runners foot doesn't actually land as far in front, or as much on the heel, as it would if it weren't being pulled back by the rubber band.You can see in the bottom row that the runners form has changed and isn't overstriding as much, and is landing in a more mid-foot pattern.Hopefully, I just saved you some money or time. No need to buy or build your own exotendon.What the exotendon is doing is giving the runner a cue to run in the way that most people do when they get out of padded, elevated-heel, motion-controlled shoes!Want the same effect?Simply take the time to adapt to "natural running," by landing with your foot closer to your center of gravity instead of far out in front of you, and land, ideally, on your forefoot (no need to STAY on your forefoot only, let your foot do what's natural and use the springs built into it... your heel can drop to the ground if it feels right to do so).BTW, while many barefoot runners say that either a midfoot or forefoot landing is what you want to do, research from Harvard's Irene Davis shows that impact forces are lower with a forefoot landing than a midfoot one. So if you're a mid-footer now, you may want to experiment with "moving up" to the forefoot.Another thing that the rubber band did for runners: their cadence went up. That is, the number of times their feet hit the ground in a minute increased (without running faster). Obviously, you can do that on your own, too.The researchers say that the exotendon only works when running on flat surfaces. Needless to say, you can use natural movement anywhere, any time, under all conditions.To be fair, I'm actually NOT badmouthing the exotendon. In fact, it could be a great training aid to help people feel what a better movement pattern is like and make the switch.But it's important to know what's really going on, what the real purpose of the device is. That could actually make it MORE effective, and wean you from it more quickly.Frankly, I'm in favor of whatever it takes to help you Live Life Feet First.Keep this one last thing in mind though -- if you thought you go weird looks when you tried running barefoot, or even in Xero Shoes, just wait until you hear the comments when you strap a rubber band to your feet and hit the roads!The content of this post does not constitute and is not intended to be a substitute for professional medical advice, diagnosis or treatment. Always seek the advice of a physician or other qualified health provider with any questions or concerns you may have about your health or a medical condition.
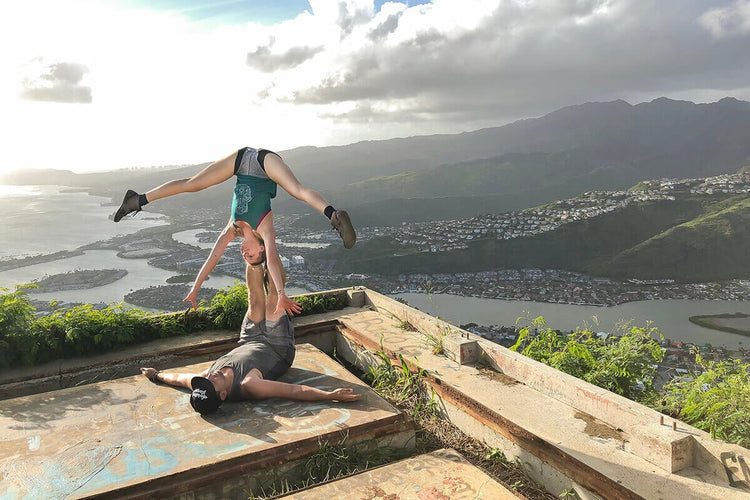
Hiking on a 49% Grade: Koko Head Crater Trail
If you’re ever on the Hawaiian island of Oahu, take time away from the beach to hike Oahu’s many trails. Each are beautifully unique, providing you access into the mountains or a path to breathtaking views. One of the most unique hikes you’ll ever experience is the Koko Head Crater Trail. Created by the military during World War II, this trail is a perfectly-straight line up the face of an ancient volcanic crater. The higher you go, the steeper the trail becomes. The trail is actually a former tram railway, where you’ll step on 1,050 railroad ties. Due to the extreme slope, each railroad tie is essentially a stair, providing a relatively safe, but exhausting climb to the summit. As the slope increases, each stair is substantially higher than a normal, seven-inch stair that you’re used to. Plan on 12-18” of gain with each step as you approach the top. Our Strava recorded a 49% grade for the entire top section of the rail trail. Forty-nine percent. You’ll definitely want to feel each railroad tie, safely below your foot, before you transfer your weight and step up. We loved the stability and light-weight simplicity of our DayLite Hikers, protecting our feet from the scorching-hot surface of the old railroad ties, while providing the flexibility needed for our feet to feel their way to the top of the climb. The ankle support and protection of the DayLite Hiker was also a huge advantage, as we asked our legs to do things they normally don’t do. There is one short section where the railroad ties are elevated. Don’t look down as you cross 50’ above the ground, stepping from one railroad tie to the next! This section of the trail is one of the flatter parts, and it will be over before you know it.Facing south with some head-tall vegetation, the trail is very exposed. We recommend an early-morning start to beat the heat and beat the crowds. Take more water along than you’d normally hike with. We’d definitely recommend a pack-mounted hydration system, since you’ll almost-certainly be scrambling on all fours on certain parts of your trek. Take several breaks going up—especially as you near the top. It may take you 20-45 minutes but it’s worth every step. Once you arrive at the top of the trail, explore the concrete remains of the World War II mountain-top military installation. You won’t be at the summit, but you can easily get there by climbing another 50-75 feet of elevation as you walk along the concrete structures and the connecting dirt paths. Known as a pillbox, these WWII-era, concrete structures are located on strategic viewpoints throughout the island, and are the destination for several dozen trails.The view at the top is spectacular, with 360-degree views of the surrounding area. Most impressive is the view of the trail itself, as you see a straight line descending below your feet back to the parking lot. In 0.7 miles of climbing, you will gain nearly 1,100 feet of elevation, and the return walk is as simple as putting one foot in front of the other.The Koko Head Crater Trail is easy to access, located near Hanauma Bay and the city of Hawaii Kai. Parking and the trail are free, but are quickly growing in popularity. Get an early start, stay hydrated, and be prepared for a unique experience that your legs will never forget.@WildAcroDuo Chris & RoxyThe content of this post does not constitute and is not intended to be a substitute for professional medical advice, diagnosis or treatment. Always seek the advice of a physician or other qualified health provider with any questions or concerns you may have about your health or a medical condition.

Dave Cavanagh + Xero Shoes Prio = American Ninja Warrior!
BIG CONGRATS to Dave CavanaghDave is a multiple-time "walk on" to American Ninja Warrior. He was, finally, invited to compete in the recent try-outs in Baltimore and... well... check out how he did.And check out the shoes he's wearing!Yup, those are our best-selling running/fitness shoe, the Prio. Dave is heading to Las Vegas for the finals and we're all rooting for him!