latest News

Fitness for Executives - Dobbycizing
Trying to get a good workout, but don't have enough time?Xero Shoes CFO and co-founder, Lena Phoenix, has a new workout program that I know you'll love.Do you have a similar fitness plan?If so, we'd love to see it!
Maximal Shoes Not a Solution?
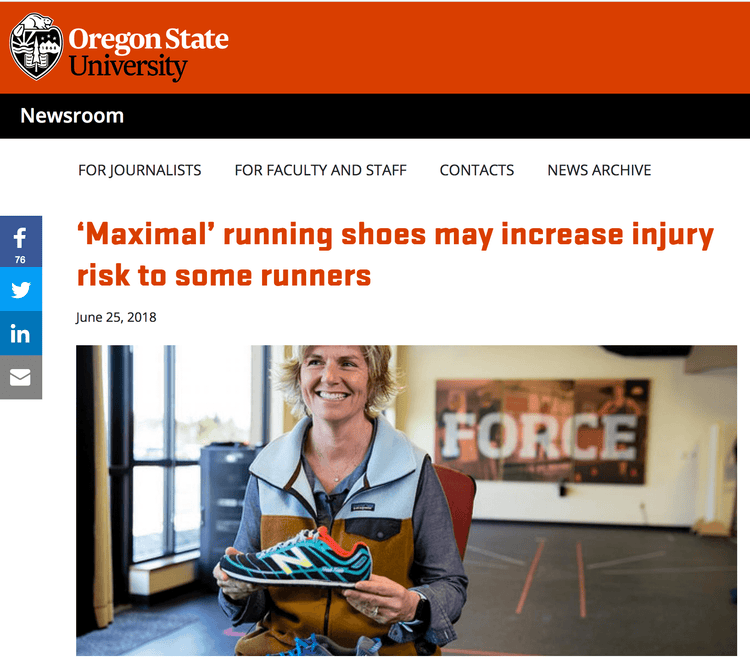
From the "We told you so" file comes this new bit of running shoe research:The study concluded that runners experienced a higher impact peak and increased loading rate with the “maximal” shoes. Increases in both factors are associated with a greater likelihood of injury, such as plantar fasciitis and tibial stress fractures.Actually, this isn't "new." Harvard's Dr. Irene Davis discovered the same thing.In short: cushioning doesn't cushion.Why not?Think about your foot -- 1/4 of the bones and joints in your entire body are in your feet and ankles. And you have more nerve endings in your soles than anywhere but your fingertips and lips.Given all that, it seems pretty clear that your feet are made to bend, move, flex, and FEEL the world.That means your brain is designed to KNOW what's going on down there... so it can help you control your whole body, head to toe, more effectively and efficiently.If you attenuate the information your brain wants to receive (probably NEEDS to receive) with a bunch of cushioning, one adaptation is to land harder so that it can feel something.If you want to reduce impact forces, what you ultimately need is some form of shock absorber that can adjust almost instantly to changing loads, changing speed, and changing angles. Ideally, something that doesn't break down and need replacing every 3-500 miles. And even better if it can return energy -- or generate additional energy.Oh, wait, you already have that!It's called the muscles, ligaments, and tendons in your feet, ankles, legs, knees, and back.And if you use them naturally, they can keep you happy well into your old age.That's what Xero Shoes are all about. Letting your body do what's natural with just enough protection -- and some style -- for your active life.The content of this post does not constitute and is not intended to be a substitute for professional medical advice, diagnosis or treatment. Always seek the advice of a physician or other qualified health provider with any questions or concerns you may have about your health or a medical condition.
How to Get Primal with Your Fitness Plan
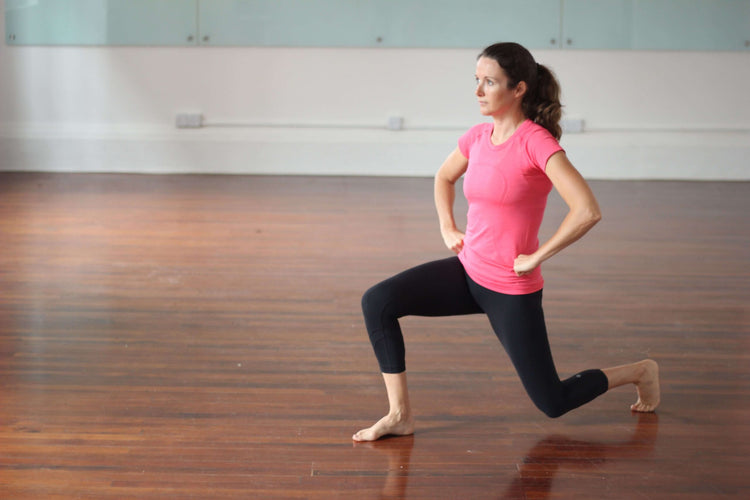
There is certain footwear that was designed to help your feet move naturally. Similarly, there are certain movement patterns that your body was designed to do. These are called the “primal movement patterns." The primal movement patterns should form the basis for your fitness plan if you want to move better, achieve better sports performance, or simply make activities of daily living easier.Over time, the primal movement patterns have slowly been neglected in the lives of many modern people. Perhaps you’ve gradually stopped moving the way nature intended as your lifestyle became more sedentary? Driving cars for long periods and sitting at desks all day are two of the modern day behaviors that take us away from having healthy, functional bodies if they are not adequately compensated for.So what are these primal movement patterns that your body was designed to do? And what type of fitness sessions can help you weave them into your plan? Let’s find out!The primal movement patternsSquatObserve toddlers doing this one if you want to check out some great form! Squats work your full lower body, specifically your quads, hamstrings and glutes. The squat movement provides a powerful foundation for most sports, as well as everyday tasks like picking things off the ground.LungeWorking similar muscles to the squat, lunges are another fantastic exercise for the lower body. They are performed in a split stance so require a bit of extra balance and co-ordination as compared to the squat. Practice your lunges to get a great leg reach and push when you’re out climbing rocks, or to take really strong strides when you’re hiking up a hill in your DayLite Hiker.PushThe push movement pattern is the one you would do in a push up, or during a bench press. The push action works your chest, triceps and the front of your shoulders. It enables you to push your bodyweight out of a swimming pool easily and to get the inertia needed to push a heavy door or trolley.PullWorking the opposing muscle groups to push exercises, the pull movement pattern focuses on your back, biceps and rear shoulders. It helps to create a balanced, tall posture and is a great counter-action to the forward rounding posture you might find yourself in when driving a car or sitting at a desk. In terms of workout exercises, the chin up, lat pulldown and seated row are all good examples of the pull movement pattern.BendBending involves hinging forward at the hips with a long, straight spine. It’s a common movement that is often done in place of a squat; for example bending down to pick a baby up off the ground. It may well be the movement pattern with the highest risk for injury, as a result of lower back issues stemming from a weak and/or inflexible spine. The straight legged deadlift is an example of a gym based exercise that uses the bend movement pattern.TwistOften neglected in workouts, the twist movement pattern is used in a huge number of everyday activities. You twist when you turn to look back over your shoulder, or to throw a ball. Twisting even occurs during walking and running. The twist pattern is often added to another movement pattern. For example, a twist could be added to the bottom of a lunge. It’s also done on its own in the case of exercises such as cable wood chops and medicine ball twists.GaitLast but certainly not least is gait, which is essentially walking and running. Yes, you were born to run! So whether you’re taking a leisurely stroll through the city in the Hana, or you’re hitting the trail in your Terraflex, you’ll be executing the gait movement pattern.So how can you incorporate these primal movement patterns into your fitness plan? Here are a few ideas…Primal fitness sessions Do a bodyweight workout that incorporates variations of the primal movement patterns. This is a great option because you can do it anytime, anywhere, and you can even do it completely barefoot. Find a progression level of each movement pattern that suits your ability and you’ll be sorted! Try a CrossFit class. CrossFit classes incorporate primal movement patterns using your own bodyweight and small equipment. The CrossFit philosophy aligns with the barefoot movement so many attendees will likely opt to wear barefoot style shoes. The Prio is a great choice for this type of workout. Other types of workouts that generally incorporate the primal movement patterns include bootcamps and circuit classes. How are you going to incorporate the primal movement patterns for a functionally fit body? Grab your favorite pair of Xero Shoes and go for it!–Elly McGuiness, ellymcguinness.com The content of this post does not constitute and is not intended to be a substitute for professional medical advice, diagnosis or treatment. Always seek the advice of a physician or other qualified health provider with any questions or concerns you may have about your health or a medical condition.

Xero Shoes compared to "Big Shoe"
On Friday, at their national conference, the American College of Sports Medicine hosted a panel discussion about the Science and Biomechanics of Footwear featuring representatives from Adidas, Brooks, Topo Athletic and then, me, Steven, from Xero Shoes.The room was PACKED -- the highest turnout of any event at the conference.I don't want to say too much about the discussion -- watch it below. But you'll notice that the Brooks and Adidas presentations never say that their footwear reduces injury or improves performance, despite that being one of their goals.Big Shoe companies have had almost 50 years to improve over the simple footwear humans have worn for thousands of years, but it doesn't seem the have.On the other hand, research is showing the value and benefits of natural movement in truly minimalist footwear (which isn't the same as footwear that calls itself minimalist, but isn't really).Here are a few points I wanted to make, but didn't get to:I wanted to show how your arch is strong when you let it work, but gets weaker when it's supported, like I did here.I wanted to say that you don't need a transition shoe, you just get in something truly minimalist and then build up slowly. If you go to the gym, you don't get stronger by doing bicep curls and only lifting the weight 1"... you go through the whole range of motion, first with a light weight, and then with more and more weight and more and more sets and reps. Same thing with getting used to natural running and walking.I wanted to say that we know speed is a function of "mass specific force." If you have identical twins who run with the same form, the one who applies more force into the ground will be faster. We don't know someone can apply MORE force, but we know how they can apply LESS: spread the force over more surface area, or apply the force more slowly. The one thing that ALWAYS spreads force and slows it down is cushioning.I wanted to point out that it won't matter if you make custom-made, 3D printed shoes, if you're using the same fundamental design -- high heels, flared soles, stiff soles, and pointy toe boxes. In the last 50 years, there have been hundreds of "new technologies" in footwear... where are they now? Custom-made and 3D printed soles are just the latest in the same ideas that, again, have never been shown to be helpful.I wanted to tell the story I was told (by someone who worked with Bill Bowerman) about why Nike started making high-heeled excessively padded shoes.I wanted to explain how just putting a higher-heeled shoe on your foot MAKES you overstride and heel strike, and that landing on your heel is unstable, which is why you then need to correct this with motion control, and that overstriding leads to landing with your arch flattened out and weak, which is why you then need to add arch support (which just weakens your feet more). In other words, most of the technology in shoes is there to correct for a problem that the original shoe design seems to have caused.Needless to say, I could have said a lot more, had we the time. Rumor has it we may have Round 2 of this conversation at another sports medicine event. I can't wait.
Single Leg Exercises for Foot and Leg Strength
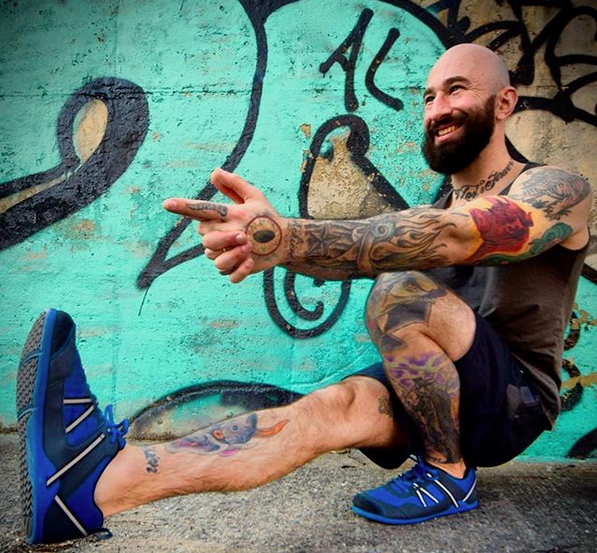
Any time you balance on one leg, you activate muscles in the foot that may otherwise remain underutilized. In fact, standing on one leg can be quite challenging if you’re not accustomed to it, especially when you’re barefoot.Don’t believe me? Give it a shot for yourself right now and see how long you can stand barefoot on one leg.How did it go? Harder than you thought, right?Even if you’re able to balance for a long time on one foot, chances are that you felt yourself having to make lots of tiny adjustments in order to stay balanced—and that’s why standing on one foot is so good for you!Those little adjustments mean your foot has to work a lot harder than when you’re using two legs to support yourself. And that means your feet are going to get stronger!After you’ve gotten comfortable balancing on one foot, you can add in some other elements to increase the difficulty—and the benefits—of standing on one leg.Here are a few of my favorites:1. One Legged Foot HoldStand upright and lift one foot off the floor, bringing your knee as high as you can toward your chest. Slowly reach over and grab beneath your other foot, interlacing your fingers with your hands below your toes. For an added challenge, you can try extending the airborne leg. Either way, don’t forget to keep your standing leg locked!2. Dancer’s PoseThis time you will be holding your non-balancing leg behind your body, rather than in front. Stand upright and lift one leg behind you, grabbing the ankle with the hand of the same side (right hand to right foot, etc.). From here, reach your other arm into the air, lean forward and kick your back leg as high into the air as possible. Try to create balance by simultaneously kicking your foot back into your hand while reaching your other arm forward with equal force.3. Pistol SquatNow you are going to attempt to add a full squat into the equation, which requires considerably more strength and balance than just standing. Begin by standing upright with one leg lifted into the air in front of you. On your standing leg, bend from the hip, knee and ankle to squat all the way down until your hamstrings rest against your calf. Pause here briefly, the press your entire foot into the floor, brace your abs and reach your arms forward to return to a standing position. If you are unable to perform this move, you can practice by holding onto a door frame, pole or other sturdy object for assistance.Remember, the stronger your feet and legs, the better you’ll feel running in your Xero Shoes. Now let’s get out there and feel the world!—Al KavadloAl Kavadlo is one of the world’s leading experts in bodyweight strength training and calisthenics. He’s also the author of several books, including the Amazon bestsellers Get Strong and Street Workout.The content of this post does not constitute and is not intended to be a substitute for professional medical advice, diagnosis or treatment. Always seek the advice of a physician or other qualified health provider with any questions or concerns you may have about your health or a medical condition.

DO NOT “TRANSITION SLOWLY” TO BAREFOOT RUNNING
The more time you spend researching barefoot running and minimalist running — the more articles, interviews with doctors or runners, news stories, and research you dive into — the more you’ll hear one particular warning.Transition to barefoot running SLOWLY. If you make the transition too quickly, you’ll get hurt.Actually, if the piece supports running barefoot, you’ll hear this as a recommendation. If the piece is “anti-barefoot,” then it’ll be a warning.Why You Shouldn’t “Transition Slowly” to Barefoot RunningAdmittedly, even on this site I say something that could sound similar about how to start running barefoot.But to focus on how quickly or slowly you make the transition is to miss the point. Running barefoot safely and enjoyably isn’t about whether it takes you a day, a week, or a year to do so. It’s about HOW you make the transition, not HOW LONG it takes to make it.Transitioning safely to barefoot running (or running in minimalist footwear) is about form, not about seconds on the clock.7 Tips to Help You Smoothly Transition to Barefoot RunningFollow these rules for a safe and smooth transition to barefoot running: Go barefoot or wear a truly minimalist shoe Run on hard and smooth surfaces Your foot should land under your body Use less energy and effort Have your feet touch the ground as little as possible Pick up your cadence Have fun Let’s dive into each of these tips. 1. Go Straight to Barefoot (or Wear a TRULY Minimalist Shoe)It may seem logical that if you've been wearing a shoe with a lot of cushioning or a highly elevated heel, you would want to just slowly transition by starting with a shoe that has less cushioning and a lower heel… and then less and lower until you’re ready for running barefoot or in a barefoot-style shoe.In reality, transitioning to minimalist shoes by going slowly to thinner shoes is not the best way to learn to run barefoot or to run with proper, natural form. Dr. Irene Davis showed how “transition shoes” (which she called “partial minimalist”) can be worse for you than any other shoe, or being barefoot.Instead, you want to go straight to being actually barefoot, since that’ll give you the most feedback, and feedback is what helps you develop natural running form. If that seems too crazy, you can wear a truly minimalist, or “barefoot” shoe with a flat, flexible sole, no unnecessary cushioning, and a wider, foot-shaped toe box.Either way, the idea is to go as close to barefoot as you can and simply start SMALL and SLOW. More about that in a moment.2. Run on Hard and Smooth SurfacesIt also seems logical that you’d want to run on a cushioned surface, like grass.But, successful barefooters recommend running on a HARD, smooth surface… the reason is that you get more feedback from running on a nice road or bike path than you do from running on the grass. Plus, grass tends to be uneven, which could lead to tripping or ankle sprains, and there could be things hiding in the grass that you don’t want to step on… or in.If you want to see a barefoot runner get misty-eyed, show them a freshly painted white line on the side of the road. It's soft, it's smooth, it's cool, it's delightful :-)3. Your Foot Should Land Under Your Body When your foot touches the ground, it should be almost directly under your body. Don’t “overstride.” That is, don’t reach out in front of you with your foot in order to land. Many people who’ve been running in padded, motion-controlled shoes already overstride, reaching out with their heels and landing with an almost straight leg. Some people have heard that when running barefoot, you're supposed to land on your forefoot and will still overstride, but point their toes in order to land on their forefoot.Do not do this!Landing on your forefoot, with your foot out in front of your body puts extra stress on the forefoot and could lead to problems or injury. 4. Use Less Energy & EffortMany people think that when you start running barefoot, calf pain and Achilles pain are almost required. Trust me, 99 times out of 100 calf or Achilles pain comes from using too much effort. And, trust me again, you’re probably not the 1 out of 100 for whom it’s not.As you transition to barefoot running, focus on relaxing, using less energy and effort. For example, rather than pushing yourself off the ground with your foot/toes, try to lift your foot off the ground by flexing at the hip. Pushing off the ground uses WAY more calf muscle effort than is necessary. Similarly, if you think you have to stay on your toes and never let your heel touch the ground, which isn’t true, you’ll put more strain on your Achilles tendon than you need. You can let your heal naturally come to the ground instead.5. Touch the Ground as Little as PossibleWhen barefoot running, or running in truly minimalist shoes, try to focus on touching the ground as little as you can. Rather than “landing” on your feet, think of your feet as something that only touch the ground for as little time as necessary.One way to think about this is that when your feet touch the ground, have them moving at the speed you’re traveling across the ground. Another image that could help here: Your feet should contact the ground more like a wheel that just rolls over it, rather than like a stick that gets planted and pulled out.Another idea: Imagine lifting your foot off the ground before it even touches it. This could help you get your foot off the ground faster.Many other instructions you may find about how to run barefoot are just cues to help you get the correct foot placement and use less effort. 6. Pick Up Your CadenceCadence is the number of steps you take per minute.Picking up your cadence means taking slightly more steps per minute without running faster.There's a commonly held idea that when you run barefoot your cadence should be 180 steps per minute. 180 is not a magic number. Increasing your cadence (just a bit) makes it easier to place your feet under your body, at the correct speed, and with less effort. You can’t “plant” your feet, when they have no time to spend on the ground. You will want to experiment with different cadences that are slightly faster than what you're used to. Knowing that anything different from what you've been doing will initially feel unusual. And, yes, running with a metronome can help.7. Have Fun!You can spot a barefoot runner from 50 yards away. They look like they're having a good time. They're often smiling.So, perhaps the best instruction to help you transition to barefoot or minimalist running is to use fun as your guide. Listen to your body and HAVE FUN… And if you're not having fun, do something until you are.Besides, if you’re just grinding out the miles it’s almost guaranteed that you’ll fall into bad form and increase your chances of injury. How Long Does the Transition Take?The length of time it takes to learn to run in barefoot-style shoes or completely barefoot is different for everybody. For some, it takes no time at all because they already run in the way I described. For others, it takes longer, since they are learning a new skill and a new way to move — and different people learn at different rates. For a rough timeline, it should take anywhere from 1-4 months to fully transition to barefoot running.Effective and enjoyable barefoot running is an ongoing process. You will continue to improve the longer you do it. Taking the time to transition to barefoot running will be worth it in the long run. Focusing on the amount of time it takes you to make the change is putting your attention on the wrong thing. If you believe that it’s just about putting in the hours until you’re suddenly a successful barefoot runner, you may never make the form adjustments that will give you what you want.On the other hand, if you pay attention to the correct things, the important things – to your form, to relaxing more, to having fun – that could dramatically speed up your transition time. Pay attention to your sensations — if it hurts, take a look at the tips above and try something different until it doesn’t hurt. No pain, GAIN.Turn off the clock and turn on your awareness; you’ll have fun running barefoot (or wearing barefoot shoes) in no time.The content of this post does not constitute and is not intended to be a substitute for professional medical advice, diagnosis or treatment. Always seek the advice of a physician or other qualified health provider with any questions or concerns you may have about your health or a medical condition.

Why Barefoot Running?
While barefoot running isn't new, it's popularity has been going through the roof since Christopher McDougall's book, Born To Run, became popular in 2009.Ironically, Born To Run isn't really about barefoot running. It's about the Tarahumara Indians in the Copper Canyon of Mexico and how they're able to run pain-free and injury free for hundreds of miles, well into their 70s. It's about the first ever ultramarathon held in the Copper Canyon. It's about the fascinating characters around this race. And it's about Chris's exploration of safer, more enjoyable running.By the way, if you haven't read the book, you must. It's a great, exciting read, whether you're a runner or not. And, admittedly, I make fun of the fact that barefoot runners treat this book like the bible in my video, Sh*t Barefoot Runners Say and the follow-up, Sh*t Runners Say To Barefoot Runners.It happens that around the time the book was becoming popular, one of the people featured in the book published a study about barefoot running. That person is Dr. Daniel Lieberman from Harvard University and, in a nutshell, what Daniel showed was: Runners in shoes tend to land on their heels, essentially using the padding built into the shoes Landing in this manner sends a massive jolt of force (called an impact transient force spike) through the ankles, knees, hips, and into the spine Then... Runners who run barefoot tend to land on their forefoot or midfoot, with the landing point nearer to the body's center of mass (not out in front of the body, like shod runners) Barefoot runners use the natural shock-absorbing, spring-like mechanism of the muscles, ligaments and tendons within and around the foot, the ankle, the knee, and the hip. Barefoot runners do not create the impact transient force spike through their joints In short, running shoes could be the cause of the very injuries for which they're sold as cures!Take off your shoes and you're less likely to land in a biomechanically compromised manner.This seems to explain why people who run barefoot often report the elimination of injuries (that were caused by bad form that they no longer use) and, more importantly, that running is more fun!Now it's not all as simple as this.The shoe companies, realizing that barefoot was becoming a big deal, began selling "barefoot shoes"... most of which are no more barefoot than a pair of stilts.Even the Vibram Fivefingers, which look like bare feet, aren't necessarily as barefoot as they appear.The key to successful barefoot running seems to be the ability to use the nerves in your feet, to Feel The World. Basically, if you try to run barefoot the same way you do when you're in shoes, IT HURTS!Figure out how to do what doesn't hurt and you'll be running in a way that's more fun and less likely to cause injuries.Now, I know it's not as simple as that, and I'm the first to admit that the science supporting barefoot running isn't in yet. But, then again, there's no science that shows that running shoes are helpful.Think about this: people lived for millions of years without shoes, or without anything more than a pair of sandals like Xero Shoes or a pair of moccasins. Runners ran successfully up until the 1970s with shoes that had no padding, no pronation control, no orthotics, and no high-tech materials.The three parts of our body that have the most nerve endings are our hands, our mouths and our feet. There's only one of those that we regularly cover and make numb to the world... does that seem right?Put a limb in a cast and it comes out of the cast a month later atrophied and weaker. When you bind your feet in shoes that don't let your foot flex or feel the earth, isn't that similar to putting it in a cast (or as barefoot runners like to say, a "foot coffin")?There's a lot more on this site about what the benefits of barefoot running -- and walking, and hiking, and dancing, and playing -- may be. If you have any questions, ask them here, or on our Forum. Or follow us on Facebook, Twitter, Youtube, and Pinterest.Join the conversation. Join the conversion. Feel The World!
What's the WORST surface for running barefoot?
When I tell people that I run barefoot (or when they see me out running without any shoes), the first response I get is: "Oh, so you run on the grass?" Or when I suggest to people that they might want to try running barefoot, the first thing they say is, "With my feet/knees/ankles/eyelashes, I'd need to run on the grass." I mean, it makes sense, right? Grass is soft. Feet are soft. Therefore, feet should be on grass. Barefoot = Grass is the common wisdom. But wisdom is rarely common, and what's common is rarely wise. Here's what I can tell you, though. And it's not just me, every accomplished barefoot runner I know will say the same thing. And all the other good coaches I know agree. In fact, what I'm about to say is SO true, that if you meet a coach who tells you otherwise, RUN AWAY (barefoot or not, I don't care) from this person as quickly as you can, because they don't know what they're talking about. Here it is: THE WORST SURFACE for learning to run barefoot is GRASS. THE WORST. ABSOLUTELY. Why? Three big reasons: BIG: Who knows what's hiding in the grass. If you can't see it, you might step on it. BIGGER: One of the principles of barefoot running is that you don't use cushioning in your shoes... well, when you run on grass, you've basically taken the cushioning out of your shoes and put it into the ground. BIGGEST: Running on grass, or any soft surface does not give you the feedback you need about your barefoot running form to help you change and improve your form. The best surface for barefoot running is NOT grass or sand or anything soft, but the smoothest and hardest surface you can find. For me, here in Boulder, Colorado, we have miles and miles of bike path. In New York City, the sidewalks are perfect! So, what makes a hard, smooth surface the best? It's the biggest reason, from above: FEEDBACK. Grass and sand and soft surfaces are too forgiving of bad form. Hard smooth surfaces tell you, with every step, whether you're using the right form. If it hurts, you're not. If you end up with blisters, you didn't. Pay close attention and each step is giving you information about how to run lighter, easier, faster, longer. I'll never forget going out on the University of Colorado sidewalks with the Boulder Barefoot Running Club. I had a blister on the ball of my left foot (more about that in another lesson). But I decided to see if I could run in such a way that I didn't hurt . At first, each step sent a shooting pain up my leg. Then I made some adjustments and I just felt the friction on the ball of my foot. By the end of the first mile, I had made some other adjustments -- using each step as an experiment -- and the next thing I knew I was picking up the pace while putting out less energy than ever. I was running faster and easier than I'd ever run without shoes... and it was painless. This would have never happened on grass. I needed the feedback of the hard surface. If you want to see a barefoot runner get a wistful look in his or her eye, mention a newly painted white line on the side of a road. Smooth, solid, cool... it's the best! ;-) Oh, and it's probably no surprise that the advantage of Xero Shoes is that when you wear those on the road, they still give you that feedback you need... but with protection from the surface.

Huarache Running Sandals of the Tarahumara - Kits and Custom huaraches
Okay, so the big question is, "WHY use huarache, the Tarahumara running sandals?" The answer is pretty obvious, but there are some important-yet-surprising pieces to the puzzle. The obvious answer about huarache is: It's the closest thing there is to barefoot running, without some of the hazards of barefoot running. Namely, you're adding a layer of protection to your feet that bare skin simply can't give you, no matter how well conditioned your feet are. Especially with the 4mm Vibram Cherry sole material we use in our huarache kits and custom huaraches, you get what I like to call "better-than-barefoot." The soles are so flexible it's like having nothing on, so light, you barely notice them... except it's blissfully clear that you're not getting scraped up, cut up, scratched up and dirty like you would if it was just your tootsies on the ground. That said, I'm not going to say "Don't run barefoot and run with huarache running sandals instead!" Why not? Well, because running barefoot gives you more feedback than running with ANYTHING on your feet. If you want to know how efficient your form is, go barefoot and you'll know (that is, if it hurts, you need to change something!). If you want to know if you could be running lighter or easier, go barefoot and you'll find out (did I mention: if it hurts, you need to change something?). Conversely, putting ANYTHING on your feet, including huarache sandals, can mask some improper technique, give you the illusion that you're better than you are and, possibly, lead to overtraining. Especially at first. That said, since it takes awhile to develop that new barefoot running technique, and since it takes a while for your feet to get conditioned (btw, they do NOT get calloused), I recommend a mix of barefoot and huarache running. In fact, what I often do is carry my huaraches with me when I go out barefooting. And if my feet start to get a bit sore, and I'm still a ways away from home, I'll slip on my huaraches for the 2nd half of the run. Or, I'll warm up in my huaraches, and then slip 'em off (using the method of how to tie huarache sandals here), and take off from there. Oh, if I'm on serious trails -- and by serious, I mean a lot of rocks, twigs, etc. -- then it's all huarache, all the time.
4 Exercises to Strengthen Your Feet
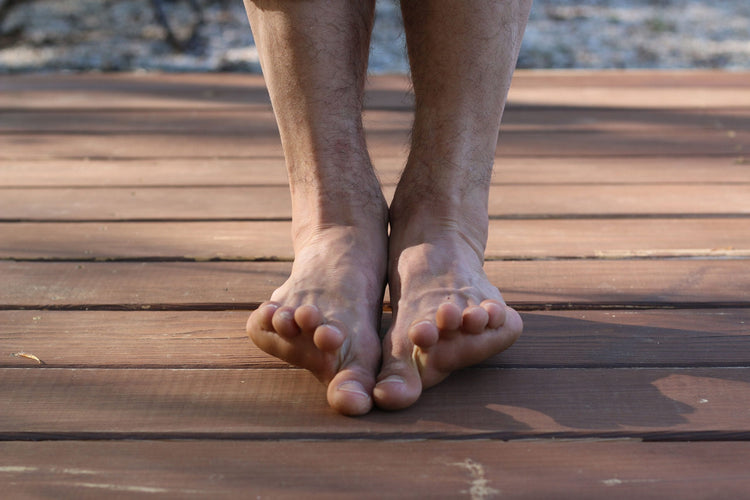
4 Exercises to Strengthen Your Feet (And Ankles) This article was recently updated on April 10, 2023 I’ve always been a fan of shoes as a fashion statement. However, when looking cool or sexy becomes the priority over feeling good, we have a problem. It is no secret nowadays that the health of our body directly affects how we think and feel. The last 10 years of my life have been dedicated to helping others feel good in their body and mind. When it comes to feeling good, I always start with the feet. Why Are Foot Strengthening Exercises Important? Many of us know how to stretch and strengthen our abs, chest, shoulders, thighs, and buttocks. But what about the feet and ankles? Feet are the foundation of our posture, but they are often ignored at the gym. You can improve your overall well-being by practicing a few main joint movements of the ankles and toes. Further down I will go over a few daily exercises to improve your health from the ground up. Your Feet Affect Everything When I teach yoga - especially my hip-focused workshops, I spend 20% of the time on the feet and ankles. The health of your feet directly affects all of the muscles and joints above, including the hips, knees, and lower back. "Supportive" Shoes Are Only A Quick Fix I always find it comical that modern medicine provides these solutions for your foot problems: Shove a sole into your shoe to lift your arches for you Find shoes that articulate your ankles for you while you walk Don't get me wrong, there is a time and place for these quick solutions. However, they are not a long-term solution that will make your feet stronger. Here is an analogy of what short-term solutions do to your body. Pretend that your body is a lazy employee at work, and your doctor is the manager. The manager can either: Teach us how to be productive and inspire us to take action Simply do the work for us and teach us nothing Firing the employee is not an option - you only have one body, after all! The best option, of course, is the one that is better for us in the long term. However, most of us don't actually take the time to support our overall well-being. If you're reading this, you probably aren't a "lazy" human being. You are looking for solutions and answers, and you are willing to do the work. This is why you have chosen to wear barefoot shoes from Xero Shoes, isn't it? You want to take care of your long-term foot health! So, let's get into building strength. How Can I Make My Foot Muscles Stronger? In order to get stronger feet, let's take a look at the four main actions of the ankle. Dorsiflexion Dorsiflexion is what we commonly refer to as flexing the feet. Stand on two feet and bend your knees, lean forward till your knees move forward. You’ll see the skin at the front of your ankle wrinkles, this action is called dorsiflexion of the ankle joint. Plantarflexion Plantarflexion is the exact opposite of dorsiflexion, and it is commonly known as pointing your foot as a ballet dancer would. Inversion Sit down with your legs out in front and turn the soles of your feet toward each other like you are making “prayer” feet. This is called inversion or inverting your ankle. Note, you may sit up on blankets or a couple of pillows if your hamstrings are on the tighter side. Eversion This is the opposite of inversion and is usually the most challenging. Stand up again, press the big toes down, and pull the outside edges of your feet up. You will see wrinkles form in the outer ankle, and you will feel the muscles along your outer shin engage. What Feet Strengthening Exercises Work? The following foot strength exercises will help to strengthen your muscles so you can perform the actions above: 1. Seated Plantar flexion Sit down with your legs in front. Plantar flex and relax your ankles repeatedly with straight knees. You are trying to activate your calf muscles. Keep your feet everted by squeezing the inner ankles together. If you need to, you can use a yoga strap to help with the range of motion. Try without the strap as well to build up your foot strength. 2. Seated Dorsiflexion This action is the opposite of the first exercise. Sit down with your legs in front and pull the tops of your feet back. Release and repeat three times or more until you feel the heat building in the top of the shins. These muscles are your tibialis anterior muscles. 3. Calf Raises Stand upright with your feet flat on the floor. Plantar Flex your ankles until your heels lift. Try not to let your ankles roll outward during these. The target muscles here are called the gastrocnemius and soleus muscles. To keep the ankles from rolling forward, you'll be using the muscles of the outer shins. 4. Inversion and Eversion Practice the inversion and eversion techniques described above. These exercises are the ABCs for your feet and ankles. Do them daily before getting out of bed to wake up all the muscles in your foot and ankle. Bonus: The Toes Take your foot exercises up a notch by spreading your toes. Also known as abduction, and you can do this either with a toe spreader or using your fingers to separate the toes. With time and repetition, you will be able to use your muscles to spread your toes. Until next time, Matt Giordano, aka @TheYogiMatt The information in this post does not take the place of medical advice. Only your doctor can provide advice, diagnosis, and treatment. Talk to your doctor or physical therapist if you have questions about your health.

Lydiard Training Plan for Runners
Arthur Lydiard was one of the most accomplished running coaches of all time and his training methods revolutionized the sport.The Lydiard Foundation is carrying on Arthur's teachings, led by Lorraine Moller, a 4-time Olympian and Olympic bronze medalist in the marathon, and Nobby Hashizume.If you're looking for a distance running training program, the Lydiard method will serve you quite well. And thanks to Lorraine and Nobby, you can grab the Lydiard First Steps course right here.Then find out more about Lydiard training at www.thexeroshoessale.com/likes/lydiard.
Water? Rocks? Running? Bring it on.
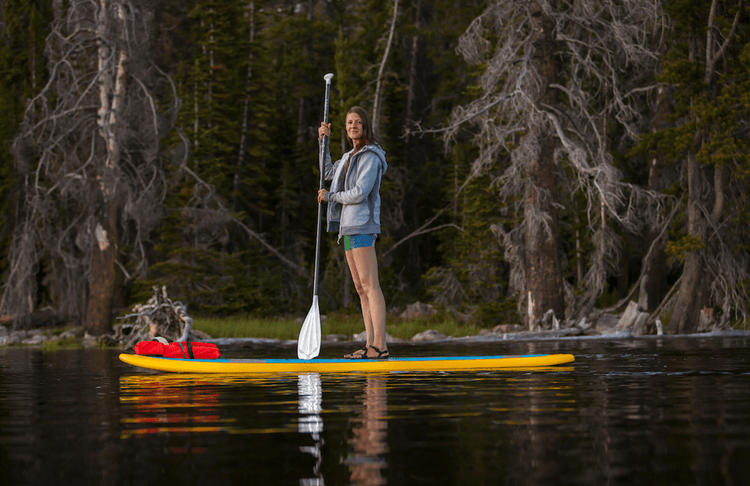
We last left you hanging wondering which model of Xero Shoe we pack along for our different adventures. We often take multiple shoes when we travel, but the Xero Z-Trek sandal always makes the cut due to its versatility, low maintenance and extreme light weight.The Z-Trek is a fantastic sandal for river and water sports. The design keeps the shoe snugly where it belongs (instead of washing out to sea) and it dries within minutes, making water-to-land transitions a non-event. We’re avid stand-up paddle boarders and have hiked our boards (SUPs) to remote waters in many parts of the world, paddling places like New Zealand, Costa Rica, South Korea, Italy, the Mississippi River, Hawaii and the U.S. Pacific Coast. Wherever we paddle, there is one commonality: You must first get to the water. Whether it’s crossing a hot parking lot covered in broken glass, a quarter mile of blistering-hot sand, or carrying our paddle boards down a large field of lava rock, our Z-Trek sandals are the perfect companion to get us to the water. Preparing to paddle the glacier lakes of Mt. Cook, New ZealandLast June, we took our SUPs on a five-day, supported run on the Green River, through Desolation and Gray Canyons. It was an 88-mile run down one of the most remote areas in the lower 48 states. We were surrounded by spectacular scenery devoid of any technology. (Especially so, because the river ate my camera phone on day one.) There were hours of stillness and quiet on the river as it meandered through the deep canyons of the Colorado Plateau, with the occasional adrenaline produced by the roar of sixty Class I-III rapids.Our tent, clothing, food and water were transported by experienced guides on small, solo, inflatable rafts. Many of the rapids had only a few safe lines to take. Some rapids only had one line– and that line changes substantially depending on the volume of water rushing down the canyon. Several times during the five-day expedition we paused upriver of the rapid and hiked out to overlook our upcoming challenge. We scrambled through hot sand and over red sandstone and rock, always watching for small cactus plants and rattle snakes. Then we’d put on our special whitewater life jackets, quick release leashes and helmets for the duration of the rapid.Our mornings were spent striking camp and then navigating downriver for a few hours. We’d break for lunch by finding a calm section of river and circling our SUPs and rafts to distribute food and swap stories. By early afternoon each day we made our campsite for the evening. Campsites are non-developed, governed by a “leave-no-trace” rules and ethos. Since they are taken on a first-come basis, we’d rise early each morning to ensure our party beat the other expeditions downriver to the next camp. Paddling the 10,000-ft lakes of the Uinta MountainsOnce camp was made, we explored the surrounding dry canyons and high desert topography. Or pass time on the river’s edge in our tents, hiding from blood-thirsty mosquitos. Occasionally we’d see another party float by on their journey to their evening camp.Paddling the Green River for five days was an amazing experience and something everyone should consider doing.This weekend we’re traveling to Moab, UT to compete in a paddle board race on a seven-mile section of the Colorado River. It’s our first race of the season. Typical of most SUP races, we have a running start into the river (while carrying our paddles and boards), paddle for about an hour and a then jump off our boards and run a short distance across a rocky shore and parking lot to the finish line. For the past few weeks we’ve debated which paddle boards to take with us; as each race board has its advantages in different conditions. But our footwear will be the Xero Z-Trek sandal – for obvious reasons: This race seems to have been designed around the functionality that we love about the Z-Trek. Water? Rocks? Running? Bring it.See pics and race results this Sunday by following us @WildAcroDuo.Until next time, Chris & Roxy