latest News
Will Vibram Five Fingers or Running Barefoot Injure You?
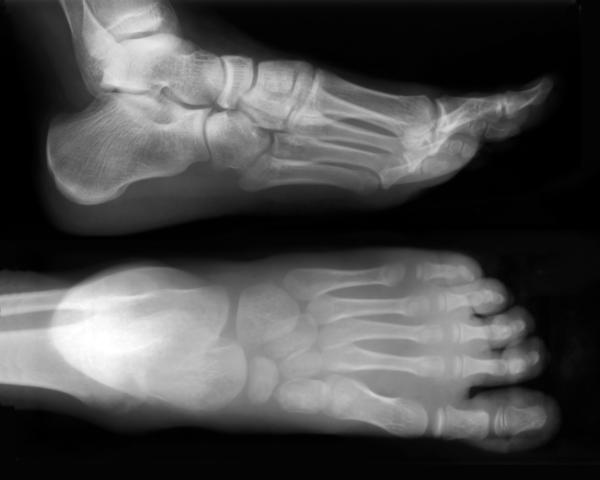
From the "Here we go again" department of the barefoot running world:About once every 2 months, some major news publication chimes in with one of these two stories: "Barefoot Running is GREAT for you" or "Barefoot running is BAD for you."The latest is of the latter variety and comes with headlines like this one from the New York Times: Barefoot Running Can Cause Injuries, Too, and Runner's World's "Study: Vibram FiveFingers Lead To Greater Risk of Foot Bone Injury.!What are these seemingly anti-barefoot articles talking about?A study done at Brigham Young University took 36 "experienced, recreational runners" and had 19 of them "gradually transition to Vibram FiveFinger running shoes over 10 weeks."After 10 weeks, 10 of the 19 had increases in "bone marrow edema."The researchers concluded that "Runners interested in transitioning to minimalist running shoes, such as Vibram FiveFingers should transition very slowly and gradually in order to avoid potential stress injury in the foot."Okay, let the picking apart begin.Before I criticize the study, let me criticize the hyperbolic reporting about the study.It's as if any time someone suggests that barefoot running might be bad for you (we'll come to whether the suggestion is valid in a moment), reporters jump on the story with a "Nah-nee nah-nee boo-boo, stick your head in doo-doo!" attitude.Look at the NYT headline. "Barefoot Running Can Cause Injuries, Too."Why is this over-the-top? Well, I hate to point out the obvious, but this study did not examine barefoot running. It looked at some runners in Vibram FiveFingers.VFFs are NOT barefoot. They may look like feet (gorilla feet, sure, but feet nonetheless), but the amount of padding and stiff rubber they have causes most runners to have a different gait pattern when they're in VFFs versus when they are barefoot. Simply, things that hurt when barefoot (e.g. over striding or landing too stiffly) are often unnoticed when in VFFs.The Runner's World headline, while accurate (it is reporting the conclusion of the researchers), it's a bit histrionic. That is, it almost implies agreement with the study. Had the reporter chosen to evaluate the study, rather than simply giving "just the facts, ma'am," or brought in an opinion from someone who evaluated the study, the headline might have been very different with a less anti-barefoot flavor.Now, don't get me wrong. Even though I'm a true believer in barefoot running (and walking and hiking and camping and kayaking and almost everything else), I'm also scientifically minded. If there were a good study that showed, "Barefoot running will erase photos from your hard drive!" I'd be the first to tell you to get a backup drive and buy some shoes.But this wasn't a good study.Let's break down the "barefoot" running study this way at first to see why:1) The researchers had the runners transition to VFFs by following a protocol from the Vibram website.2) A significant portion of those runners developed bone edema over 10 weeks.3) The researchers equated a certain amount of bone edema with injuryBased on this information, it's just as reasonable to conclude that the VFF transition program is the cause of injury, not the VFFs themselves.Next, if you poke around the podiatry and sports medicine world, you find another problem, namely, that there's a debate about the meaning of bone edema. Does bone edema = injury? The jury is out.So those two points alone should make you question what the study really shows.One thing we know it shows is that a majority of the VFF wearers got bone edema. And let's for now, assume that's the same as getting injured.In fact, let's dig a little deeper to find out that 2 of the VFF wearers got actual stress fractures -- definite injuries.Why did the runners get injured?Let's dig even deeper and look at those stress fractures.One was in the heel. How would you get that? Most likely by heel striking, a big no-no in the barefoot world and the common way to run in running shoes.The other was in the 2nd metatarsal? How would you get that? By landing hard on that bone behind your 2nd toe. And how does one do that? In my experience, by thinking "I'm supposed to land on the ball of my foot" and reaching out with your foot to do so. In other words, by over striding… the second big barefoot no-no.In other words, what this study may have really shown is that people who switch to VFFs who don't change their running form, or who change it incorrectly, get injured.But we have no way to know if that's what happened because the researchers didn't evaluate form. They didn't check to see if form changed over time.(BTW, the American Council on Exercise *did* look into that and found that most VFF runners do not change their form compared to how they ran in running shoes. Pete Larson took videos at the 2011 New York Barefoot Run and found the same thing -- most VFF runners were still heel striking as if they were in regular running shoes. Again, my explanation is that the VFFs don't give you enough feedback -- admittedly, discomfort -- to inspire the change.)The important barefoot running messageMost of us in the barefoot world like to say, "It's not the footwear, it's the form… it's just that some minimalist footwear helps you change your form better than others."What helps you change your form is feedback from the ground, the sensations you get when you run barefoot on a hard surface. In short, if it hurts, you'll try something different so that it doesn't, especially if you get a few tips about what to try (e.g. how to not overstride, how to not pull/push the ground, how to lift your feet off the ground rather than pushing).As far as getting sensations goes, barefoot is best. Xero Shoes are a close second (it's as if you're totally barefoot, but someone threw a thin layer of flexible rubber on the ground).Where are VFFs? Well, it depends on which ones you wear! Some have more padding (i.e. reduce ground feel) more than others. And in this study, we don't know which ones the runners were wearing.Let's back up a bit to another odd fact from the study. The shod runners averaged 30 miles/week, but the VFF runners averaged 15-18 miles/week. That's a BIG difference. And when you look at the transition plan, following the plan doesn't account for running half the mileage of your shoe wearing compatriots.Dr. Ridge guessed that the runners cut their mileage "because their feet hurt" but there's no indication that they ever reported pain, and since 9 out of 9 runners had no edema, they should have been still running their usual 30/week mileage, which would mean the 10 "injured" runners must have cut their mileage to about ZERO to get an average of 15-18.I suspect that the "random assignment" of people into the VFF group accidentally put the less skillful and accomplished runners into VFFs. I don't know for sure, because I don't see any stats on the pre-study mileage of each runner compared to the in-study mileage, let alone how the mileage changed for the "bone edema runners" vs. the "non-edema runners."Finally, let's look at the conclusion the researchers came to:Runners interested in transitioning to barefoot running shoes, such as Vibram FiveFingers should transition very slowly and gradually in order to avoid potential stress injury in the foot.Uh… how did they come to that conclusion?They didn't compare runners who transitioned in 4 weeks, 8 weeks, 10 weeks, or 10 years. For all we know, transitioning more slowly could be WORSE for you. Their suggestion might be as useless as, "If you want to avoid the frustration of learning Spanish, transition slowly and learn one new word per week."In other words, they have no basis to make that conclusion.The transition to barefoot running that I recommend starts with MUCH less distance than the VFF plan… but with more frequency (a little bit, more often). And it increases distance and frequency based on your unique experience, not some arbitrary schedule.Once again, I'm left with the hope for more, and more nuanced and well-designed, barefoot running studies. And, even more, for more and more nuanced reporting about barefoot running (or, in this case, minimalist running).The content of this post does not constitute and is not intended to be a substitute for professional medical advice, diagnosis or treatment. Always seek the advice of a physician or other qualified health provider with any questions or concerns you may have about your health or a medical condition.
Happy, and barefoot, St. Patrick's day!
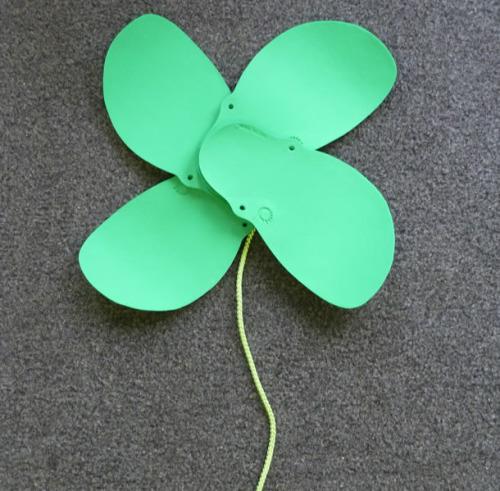
Happy St. Patrick's Day from Xero Shoes! I don't know about you, but I'd love to find this barefoot sandal 4-leaf clover in my garden. I'm sure it would make you lucky if you found it;-) Since moving to Boulder, CO almost 20 years ago, I love St. Patrick's day, not just because of the world's shortest St. Patrick's Day Parade (1/2 a block), but because by this time of year it's usually warm enough to be barefoot again. Now, granted, I'm barefoot throughout the whole winter, too. So it's not like anything is actually changing for me. Plus, we usually get our biggest snowfall of the year AFTER mid-March, so it's not time to put away the shovels. But I'm not a winter sport guy. Summer is my season. There are fewer things I like better than a nice day running on the track, or one of our evening track meets when it's still warm as the sun sets. So, for me, St. Patrick's is is the reminder that I've got month's of comfortable bare footedness coming up soon. I also have a lot of friends who have birthdays right around the 17th, so that's fun, too. What's your favorite part of St. Patrick's day, barefoot or not?

Barefoot Running is Bad For You!
Is barefoot running good or bad for you? Despite the growing popularity of barefoot running, many people still believe the myth that barefoot running is bad for you. People who THINK barefoot running is bad for you will bring up certain assertions we will address below. If someone tries to convince you that barefoot running is bad for you, here’s how you can fight back against the common misconceptions! How We Got to This Point Over the years, the debate on whether barefoot shoes were bad for you has become more heated. It started when Chris McDoguall’s book, Born to Run, became popular In 2009... There was no big argument when Olympians Zola Budd ran barefoot In the 5,000m, or when Abebe Bikila won the marathon without shoes, or when Ron Hill competed in the Mexico City Olympics in “the lightest shoes I could find.” But once “regular folk” started kicking off their kicks, it’s become a rhetorical battlefield out there — the converts touting the great benefits of barefoot running, and the critics assuring everyone that taking off your running shoes is akin to playing Russian Roulette. Then a Harvard study came out, showing that when you run barefoot, you adjust your stride to put less stress on your body. But, right on the heels of it (pun intended), came editorials about how running barefoot is the worst thing you could do… though, most of those editorials came from people who own or work for shoe companies or shoe sellers. Yesterday, someone forwarded me an email saying “Well, I’ve seen people who tried running barefoot and they got injured! I’ve seen people during marathons, sitting on the side of the road in their barefoot shoes, crying in pain!” (Of course, right after, I got an email from a Xero Shoes huaraches running sandal owner, raving about how old running injuries they used to have are gone now that they’re out of shoes, but let’s ignore that for a moment.) Mark Plaatjes, world champion marathon runner, physical therapist, and co-owner of the Boulder Running Company, has said that he doesn’t think most people have the correct body type for running barefoot. Road Runner Sports sent out an email saying, “Well, if you run barefoot, you could step on something and really screw yourself up!” (that’s not the actual quote, which I’m too lazy to look up, but the gist of what they warned). The Vancouver Sun published an article, like dozens of others like it, claiming that running barefoot was dangerous, and the proof was the opinion of some doctors. What amazes me about this back and forth nonsense is how enraged the anti-barefoot gang is getting, and how they’ve thrown out not only their logic and critical thinking skills, but how they’ve ignored what every well-known barefoot running coach has advised. So let’s address some of the issues of barefoot running, as quickly as possible (which isn’t hard, since the arguments are simple). Why People Think Barefoot Running is Bad If you memorize these answers (or print out this article and have a copy in your back pocket), you can save yourself the frustration and/or humiliation of arguing with some Know-It-All who tries to convince you that running barefoot is bad. Assertion 1: Barefoot running will give you plantar fasciitis, Achilles tendonitis, ingrown hair, or male-pattern baldness (or any other injury). Response: Runners in SHOES get the same injuries! Those problems, when they occur, are not from “barefoot running”, they’re from OVERUSE or, more commonly, bad running form. If someone you knew went to the gym for the first time, and did the workout that Arnold Schwarzenegger used in his Mr. Olympia days, they’d end up with all manner of injuries, soreness and overall inability-to-move-for-days-ness. But nobody would scream from the rooftops, “Weight lifting is bad for you!” They would say to that individual, “Dude, you did too much too soon. Scale WAY back and build up to that slowly.” Clearly, the cure for overuse is UNDERuse. Do less. Build up slowly. Use some of the cues in these articles. The only problem is that the only way to know how much you can really handle is by doing too much… until you’ve done that enough and gotten the hint. Assertion 2: Some people aren’t built to go barefoot. Response: Not only is there no evidence for this, but what the barefoot running coaches all say is that by running barefoot you develop the skills, strength, and form that allow you to run barefoot. Now, there’s not any hard science behind that argument, YET(some researchers are working on it) But, which makes more sense: That someone is physically unable to run barefoot or in minimalist running shoes (the way humans have run for hundreds of thousands of years), but is absolutely fine in shoes… or that, due to lack of use, they may need to build up the strength before they can run barefoot. Besides, the only reason they would be okay in shoes and not barefoot, is because they’ve transferred the stress that the muscles and tendons and ligaments would have to deal with if they were barefooted (and get stronger by doing so) into the bones and joints.Again, the message is, Go slowly! (seeing a pattern here?) Assertion 3: You could step on something or, worse, IN something! Response: Yeah, so? But: How bad would it REALLY be?; How often is this REALLY a problem, or are you just imagining it happening without knowing the actual numbers?; Are these injuries worse than the various problems people have in shoes?; If you do step in poo… which is easier to hose off: your feet or a waffle-soled shoe? This argument cracks me up since I offer a solution on this website — get some barefoot running shoes or sandals and you’ll add a HUGE (but thin) layer of protection that still gives you a barefoot feel. I have to back up to the “stepping in poo” idea, because I just got a call from someone who said they were worried that’s what they would do if they were walking around barefoot. ”When’s the last time you stepped in poo?” I asked. “About 20 years ago,” the poo-fearer answered. ”Then what makes you think you’ll suddenly start doing it now?” I asked. “Ohh…,” said the former poo-fearer. Assertion 4: Doctors say they’re seeing more patients with injuries who are running barefoot. Response: Doctors said the same thing 45 years ago when running shoes became popular. Doctors are not seeing the people who are not having problems running barefoot… because those people don’t go to doctors. In other words, if you don’t know the total number of people who are running barefoot, seeing an uptick in patients is a meaningless statistic. I’ve never met a doctor who asked their injured patient, “So, are you running barefoot or in something like a barefoot shoe?” (hint, most people who say they’re running barefoot have never put their bare skin on the ground, or worn something as minimalist as Xero Shoes.). I’ve never met a doctor who has said to their patient, “Let’s take a look at some slow-motion video of you running and see if the real problem is your form, and not your footwear or lack thereof.” The injury rate for people wearing "normal" shoes is estimated at 50 to 80% per year. So the real question is this: are barefoot runners getting injured at a higher or lower rate? What cracks me up about the anti-barefoot gang is the simple denial of the numbers. That is, there are millions of people taking off their shoes without a problem. You don’t end up with a movement like the barefoot running movement without a high percentage of happy converts. This alone should, but doesn’t, temper their argument on why they think barefoot running is bad for you. And, again, the answer couldn’t be simpler: Oh, if you’re going to try barefoot running, you may need to go WAY slower than you thought. You’ll have to learn to listen to your body in a way you haven’t before, and you’ll need time to build up strength to let you handle the same distances you may now be running. You may also want to get something to give your sole a bit of protection. So, Barefoot Shoes Aren’t Bad for You?! Here are a few key differences between conventional running shoes and barefoot shoes. No heel lift (zero-drop) A wider, foot-shaped toe box to let your toes spread No unnecessary cushioning An extremely flexible sole that gives you protection but is thin enough to let the nerves in your feet safely FEEL the ground and be more connected to the earth, rather than walk on it. Discover what you've been missing – natural comfort, performance and health. Feel the fun and benefits barefoot inspired shoes and live life feet first The content of this post does not constitute and is not intended to be a substitute for professional medical advice, diagnosis or treatment. Always seek the advice of a physician or other qualified health provider with any questions or concerns you may have about your health or a medical condition.

Xero Shoes Barefoot Sandals On Shark Tank
In 2013, Lena and I had the honor and pleasure of appearing on the ABC hit reality-business show, Shark Tank on ABC... and on October 1st we appeared on CNBC, who syndicated the show. Over 30,000 applied to be on the show and we were on pins and needles for months, waiting to see if our pitch would make it to the airwaves. If you didn't see the show, check it out: Since the show aired we've gotten some amazing responses. Some people think we were nuts to walk away from a $400k offer. Others think we were insane to even consider it. In the first week after the show aired, over 2,500 people decided to try Xero Shoes and experience the fun and benefits of being barefoot, but with a layer of protection, a perfect fit, a custom style, an affordable price, and our 5,000 mile warranty.THANK YOU to you everyone who emailed and called us, to the people who crashed our website with traffic (over 270,000 people!), to the people who put up with our shopping cart glitches (this cart was, it seems, not made for that kind of traffic), and to everyone who ordered some of our Original Barefootware. Happily, we have a MUCH improved website and shopping cart and, as you can see here, a MUCH more extensive line of barefoot-inspired shoes, sandals, boots, DIY kits, and more. -Steven

We were on Shark Tank!
Did you see us on ABC's Shark Tank? (if not, click here) Want to try a pair of Xero Shoes • Original Barefootware and have the fun and benefits of being barefoot... plus: The protection you want A perfect fit (you can trim them to size if you like) Style that expresses your personality (with fun lacing or decorative add ons) An affordable price Complete natural movement Our 5,000 mile warranty As of March 2020: Over 650,000 items sold in more than 130 countries, all for people who love Xero Shoes for: Walking Hiking Camping Paddle boarding Yoga Crossfit Kayaking Working out Jogging Running 100-mile ultramarathons! ... and having fun! Our DIY barefoot sandal kits are the perfect project for the family... you can make your own shoes in just a few minutes. Or you can let us do the work with our ready-made shoes and sandals. Not sure what to get, or ordering for a friend or family member? Get a gift certificate instead.
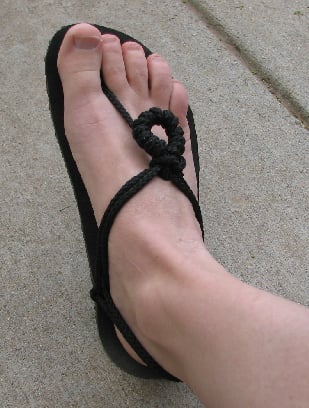
The Phoenix Flower - Barefoot Sandal tying style
Here's something simple and decorative to do with your extra lace.Plus it means you have extra lace with you if you need it!Step-by-Step instructions coming soon!
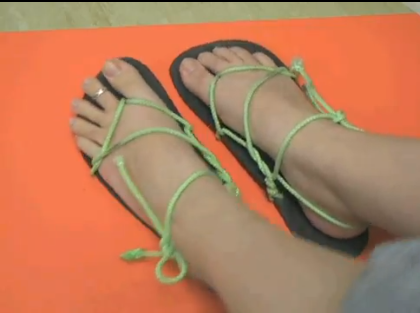
Amanda's Chaco Style Running Sandal Tying
Amanda has a clever Chaco sandal-inspired tying style First, a tying tip: Lacing tips: Amanda's Chaco-Inspired Tying Style This video makes a reference to our old name, Invisible Shoes. Also, you can do the same lacing style, but "rotate" it so the knot ends up behind your heel! And since there's exposed lace under your foot, I recommend coating that part of the lace with Shoe Goo for added protection.

Raymond's Double-Thong Running Sandal Tying Method
Raymond Mack developed this nice thong styleOnce you get the tension just right, you slip 'em on and off in a second. People use this tying style for everything from walking to running marathons.First, a tying tip:Lacing tips:Raymond's Double-Thong Tying StyleSince there's exposed lace under your foot, I recommend coating that part of the lace with Shoe Goo for added protection.Step-by-Step instructions coming soon!
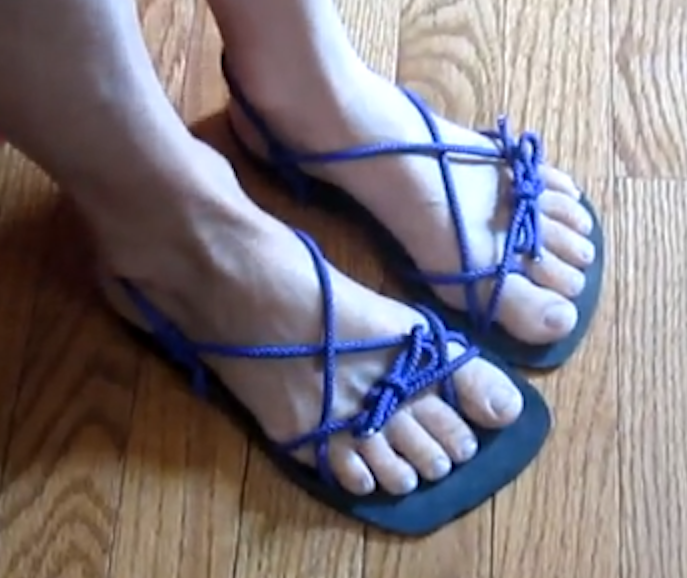
Kelly's Combined Barefoot Running Sandal Tying
Kelly's is a "combined" tying method. You can move the knot to the back of the shoe, behind your heel, if you like. First, a tying tip: Lacing tips: Kelly's Combined Tying Style This video makes a reference to our old name, Invisible Shoes and show our Classic Kit... you can do this with our FeelTrue outsoles which will be much better. Also, you can do the same lacing style, but "rotate" it so the knot ends up behind your heel! And since there's exposed lace under your foot, I recommend coating that part of the lace with Shoe Goo for added protection.
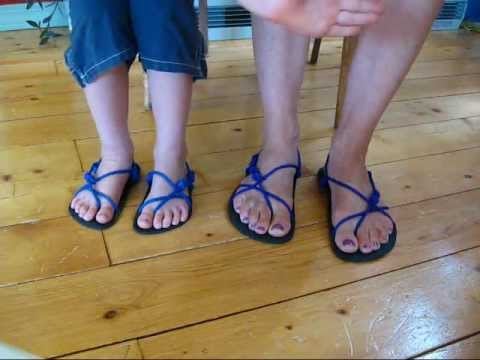
Erika's No-Knot Barefoot sandal tying methods
Erika Berglund has been on FIRE creating new tying styles. Enjoy these 3 videos (Erica reports that she’s switching all her Invisible Shoes to the 3rd style she shows in these videos): First, a few tying tip: Lacing tips: Erika's No-Knot Tying Styles This video makes a reference to our old name, Invisible Shoes. And it references Sonja's tying style. And since there's exposed lace under your foot, I recommend coating that part of the lace with Shoe Goo for added protection.
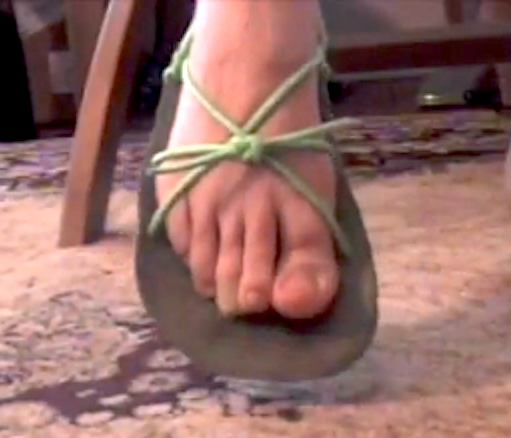
Sonja's No-Toe huarache running sandal
Sonja came up with this tying style which has no toe strap or knot under your foot.You can slip these on and off in a moment. BTW, you won't end up with a big flap in the front... that's just what happened in the picture ;-)First, a few tying tips and notes:Lacing tips:Sonja's No-Toe Tying StyleThis video makes a reference to our Classic Kit with our old name, Invisible Shoes... you can do this with our FeelTrue outsoles which will be much better.Also, you can do the same lacing style, but "rotate" it so the knot ends up behind your heel!And since there's exposed lace under your foot, I recommend coating that part of the lace with Shoe Goo for added protection.Step-by-Step instructions coming soon!
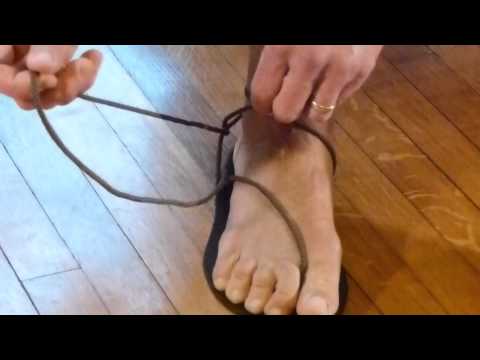
Randy's Marathon Huarache Tying Style
Randy Kreill is an ultra runner who loves his Xero Shoes.This is the tying style he came up with for his races.First, a few tying tips and notes:Tying the Lace knot:This is the knot we most commonly use, especially with our 100% polyester laces. The "Lace Bead":This is the smallest "knot" you can make for your Xero Shoes. Tying a Figure-8 knot:If you have our original laces with the nylon core, you'll want to use this knot. Lacing tips:The basic running sandal tying patternRandy's Marathon Tying StyleStep-by-Step instructions coming soon!